Tips And Tricks To Build Your Professional Makeup Kit
With Youtube dominating the makeup world, there is no shortage of creative inspiration available. This allows the average makeup lover to enhance their skills and explore professional options within the beauty industry.
Whether I’m solo or assisting another MUA, I always have my kit and brush set on hand – there is nothing worse than being asked to take the lead and you aren’t prepared and confident. With that said, I wanted to put together a quick list of essentials and offer some helpful tips and tricks to help simplify the kit building process.

PROFESSIONAL MAKEUP CASE
Depending on your kit size, a Train Case or Professional Case w/wheels is ideal – a case with wheels makes life soon much easier! I’ve found the Zuca bag to be the most convenient to pack/unpack and to travel with. It comes in a variety of sizes with removable plastic pouches to store products safely. Its titanium frame protects your kit while on the road and is uber lightweight. You’ll also want to purchase a clear set-bag for ease of finding products when you’re working on set. This will ensure no one is waiting on makeup to get the shot done!
SANITATION PRODUCTS
- Alcohol
- Hand sanitizer
- Brush cleaner
- Antibacterial wipes
- Brush cleaner
- Small towels (for sanitary work space)
DISPOSABLES
- Makeup wipes
- Q-tips
- Kleenex
- Mascara wands
- Lip wands
- Makeup sponges
- Palette paper
SKIN CARE PRODUCTS
- Moisturizer
- SPF
- Blemish treatment
- Eye cream
- Lip conditioner
- Toner
- Nutrient rich primers (one for oily and one for dry skin)

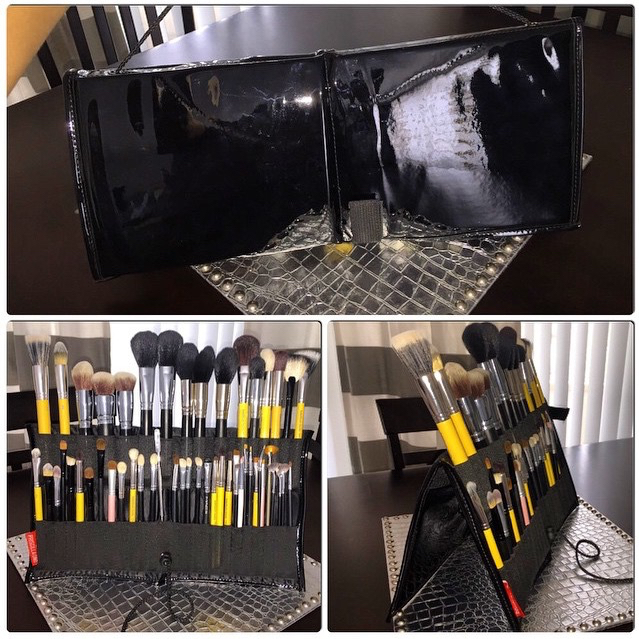
MAKEUP BRUSHES
Most brush brands offer sets with one of each brush you’ll need to do a full face. I suggest adding in a few extra shadow brushes for good measure. For the most part, I prefer synthetic brushes – they don’t hold onto the product so you get fantastic color payoff with your products. Bdellium brushes are my fave and a great investment. You’ll also want to store/carry your brushes in a brush roll or case to protect the bristles from unnecessary wear and tear. Lastly, you’ll also need a metal or plastic palette and palette knife for mixing products.
FOUNDATIONS – WARM/COOL SKIN TONES
I prefer foundation palettes as they contain a variety of colors, are economical, and don’t take up much space. This allows you to customize foundations to suit each client and achieve desired consistency by breaking them down with cream highlights/bronzers or moisturizer.
CONCEALERS
Your foundation palettes can double as concealers due to the heavier consistency, and you’ll also want to incorporate a color correction palette to camouflage skin imperfections. Make Up For Ever makes a highly pigmented one that I’ve keep in my kit at all times. Color correction palettes also contain guides to assist with perfecting the complexion.
FINISHING POWDER
Translucent, Tan, and Mocha are a great starting point. There is no need to invest in a ton of individual compact colors as they take up a lot of space and add unnecessary weight to your kit.
BLUSH, BRONZER, AND HIGHLIGHT
You can either purchase a palette that has a variety of tones or customize your own – all products can be de-potted and placed in a palette w/magnets. While working within a budget, opt for a universal bronzer/highlight combo to start. I love the LORAC TANtalizer as it works with many skin tones and doesn’t take up much space.
BROW PRODUCTS
A palette with multiple shades is best, and you can add in additional favorites as you see fit. My go-to is a brow powder palette by Anastacia Beverly Hills. Clear brow gel is another must-have – great way to tame all brows regardless of hair color.
EYE PRODUCTS
- This is all dependent on the type of beauty you want to specialize in – I prefer beauty makeup witha focus on great skin, so I tend to lean towards palettes with tones that compliment all eye colors. I have multiple eye shadow palettes, but always gravitate the 4 LORAC ones I currently have in my kit.
- Gel, pencil, and liquid/felt tip liner options– you don’t need every color under the rainbow as you can us a mixing medium to turn any powder product into a liquid for additional options
- Black and clear mascara – I keep one waterproof mascara on hand for a light “topcoat” on the lashes for special occasion work.
- Lashes – You’ll want to stock up on a few pairs of lashes to suit each eye shape along with individual lashes to add additional flare to your looks.
- Lash glue – dark and clear. You can also add in a latex free glue for clients with sensitivity/allergies.
LIPSTICK, LIP GLOSS, AND LIP LINERS
- You can start off with a few options in neutrals, reds, and pinks to mix your own colors for each client
- Clear gloss – you can use this as a mixing medium or base for lip colors
SETTING MIST
This ensures long-wear on the looks you create – I love the Hydrating Mist by Colorescience as it sets the makeup while also adding hydration to the skin (I’ve found that other setting mists are very drying and make it difficult to alter looks once it’s applied).
I hope this serves as a helpful guide for hitting the ground running as a pro MUA. I’m sure you’ve noticed that I love palettes for the majority of products. Not only does it save you time while with a client, they’re also great space savers. Make sure to assist other MUAs to obtain call-sheet credits to qualify for discounts with beauty retailers and makeup brands – this will save you a ton of money! Good luck and have fun building your kit!
xoxo